You asked, and Phil delivered! Here’s your ultimate step-by-step guide to replacing CAT 5CP seals—made simple and hassle-free!
| Here is What You’ll Need: |
| CAT Pumps 33628 Seal Kit for 5CP Pumps |
| 6mm Allen Wrench |
| Adjustable Wrench |
| Pry Bar |
| 10mm Wrench |
| Precision Screwdriver |
| WD40 |
| 15/16 Socket or 3/4 Socket |
Step 1: Remove the CAT 5CP Pump’s Head
To remove the pump’s head, unscrew the eight bolts holding it to the crankcase. You will need a six-millimeter Allen wrench to remove the bolts. Use the wrench to loosen the bolts on the head of your CAT 5CP pump. Once loose enough, remove them completely and set them aside. Don’t lose them—you’ll need them to reassemble the pump later.
Once the bolts are removed, you can detach the pump head. There are two methods to remove the head:
- Using a pulley: If the pump has a pulley, use it to help separate the head from the crankcase.
- For a bare shaft: Use an adjustable wrench to grab the keyway and turn the shaft until the head pops out. This will create enough separation between the head and crankcase to insert a pry bar.
In both cases, a pry bar is needed to remove the head from the plungers once separated from the crankcase. Gently use the pry bar to move the head toward the end of the plungers until it can be removed by hand.

Pro Tip:
Phil Donnelly aka Fix It Phil
“It’s always a good idea when you take something apart to lay it out in front of you in the order you’ve taken it apart so that you can just reverse that and put it back together in the same order that way you don’t get anything mixed up.”
Step 2: Remove the Old Oil Seals
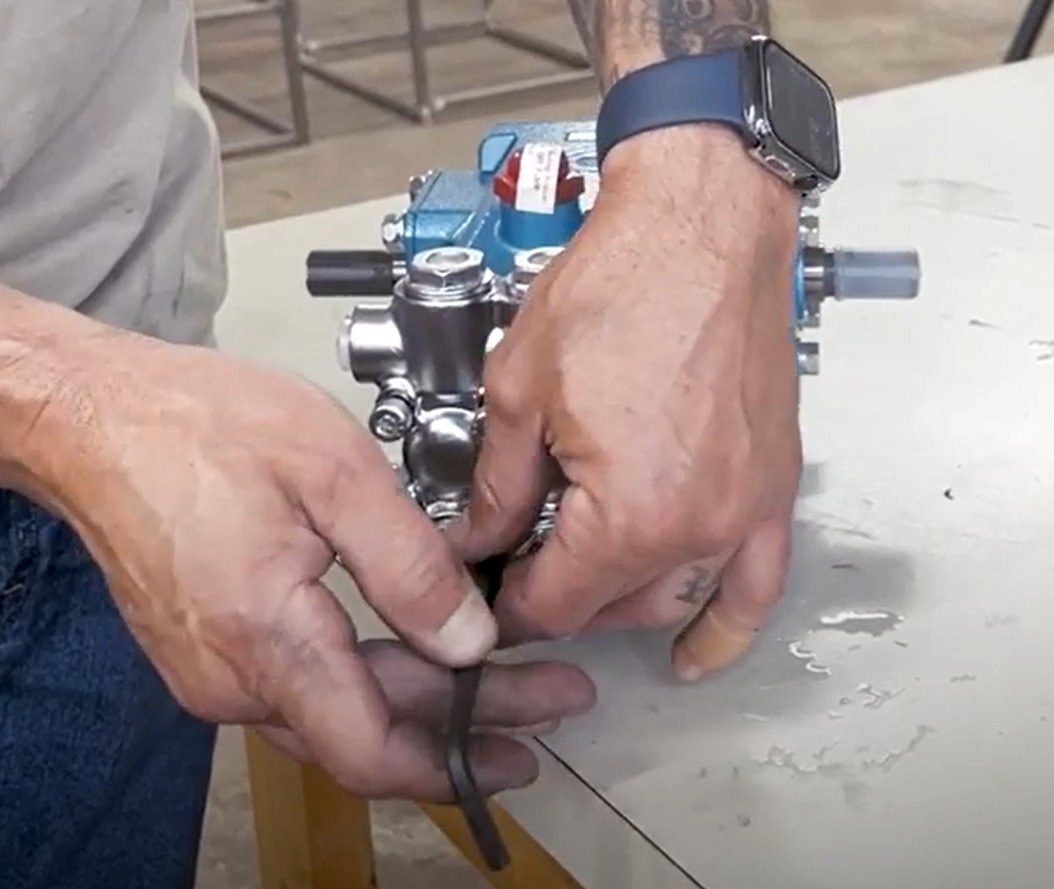
To access the oil seals the pump’s plungers must first be removed. Turn the shaft with an adjustable wrench if needed to make the bolt securing the plunger easy to remove. Use a ten-millimeter wrench to remove the bolt, ceramic plunger, and washer. This exposes the back of your CAT 5CP pump’s crankcase.
Next, remove the retainer, split washer, and slinging washer. Set them aside in the same order you removed them to simplify reassembly.
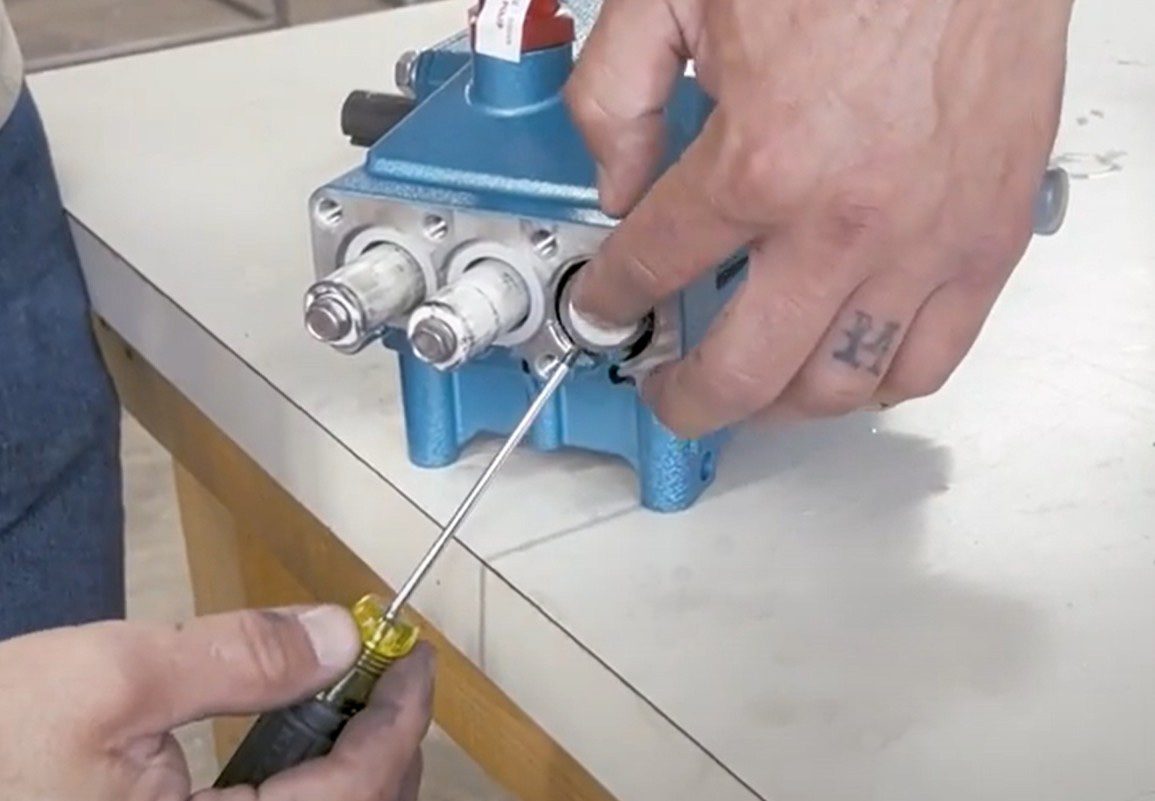
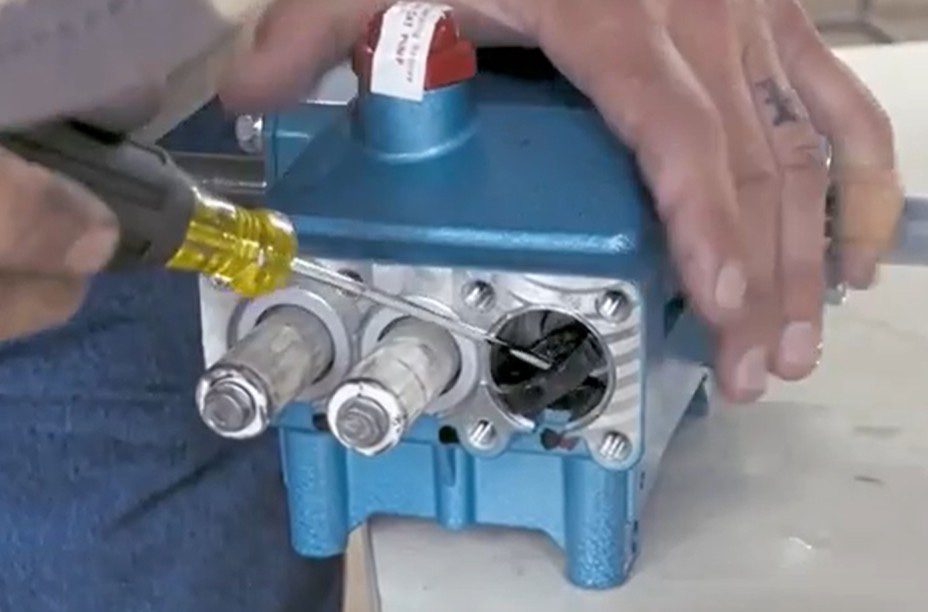
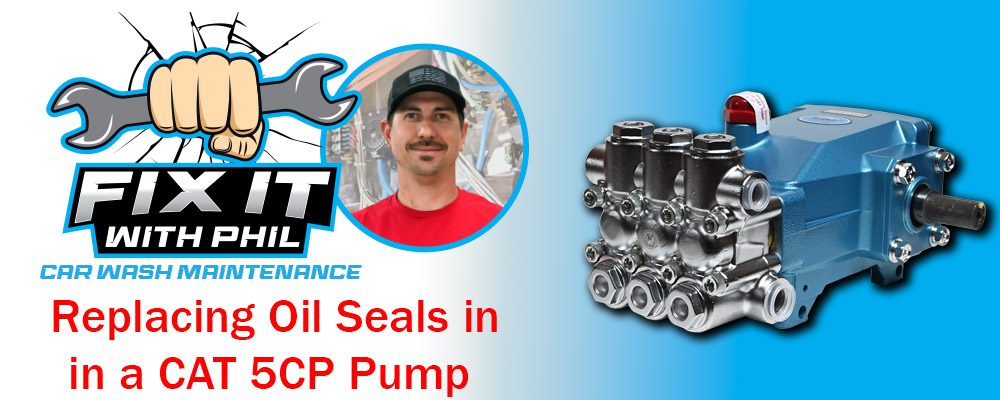
Now, turn the shaft so the pushrod is seated inside the oil seal, creating a lip gap. Insert a precision screwdriver into the gap, wiggle it slightly, and twist as if turning a screw. Repeat this process in a few spots, and the seal should pop out. Repeat for each plunger.
Step 3: Inspect for Debris
Check the crankcase for debris before replacing your CAT 5CP pump oil seals. If you notice metal shavings, something is grinding in the crankcase. This may mean you need a new pump. Installing new seals in this situation would be a waste of your time and money.
Step 4: Install the New Oil Seals in Your CAT 5CP Pump
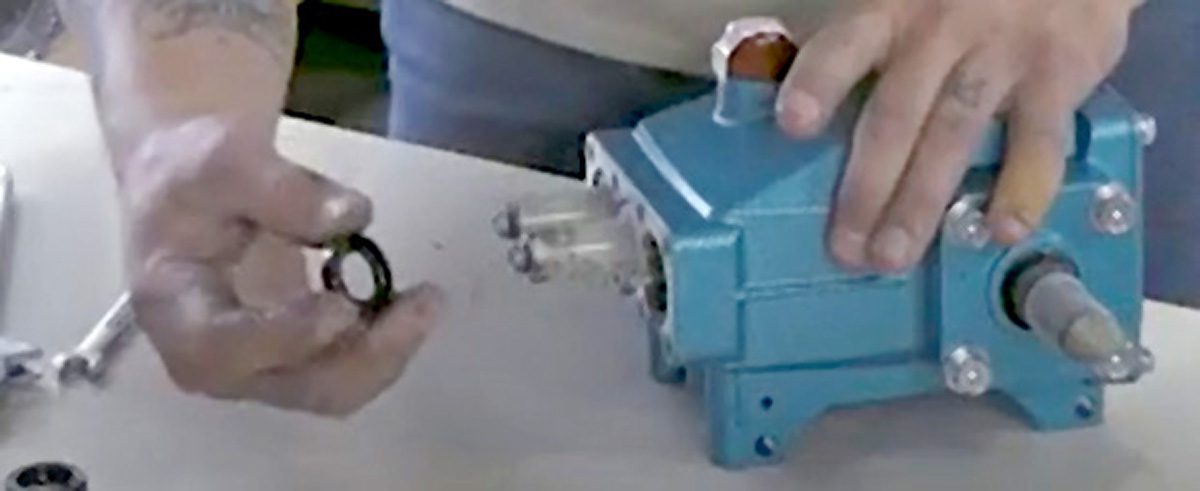
Before installation, spray the new oil seals with WD-40 to lubricate the rubber. Use your finger to position each seal as evenly as possible in its seating area.
Next, use a 15/16 socket (or 3/4 socket if necessary) to press the seal flat against its resting area. Repeat this process for all three seals.
Step 5: Rebuild and Reinstall the Plungers
After replacing the oil seals, reassemble and reinstall the plungers. If you laid the parts out in order during disassembly, reassembly is simply the reverse process. Rotate the crankshaft to move the pushrod out for the plunger you are working on. Start with the slinger washer, split washer, and finally the ceramic plunger.
If you need or want to replace the O-ring on the plunger, now is the perfect time to do so. Use a 10-millimeter wrench to screw in the bolts on the plunger. Ensure they are tight but don’t send them home or break anything. After reinstalling all three plungers, you can reattach the head to your CAT 5CP pump.
Step 6: Reattach the Pump’s Head
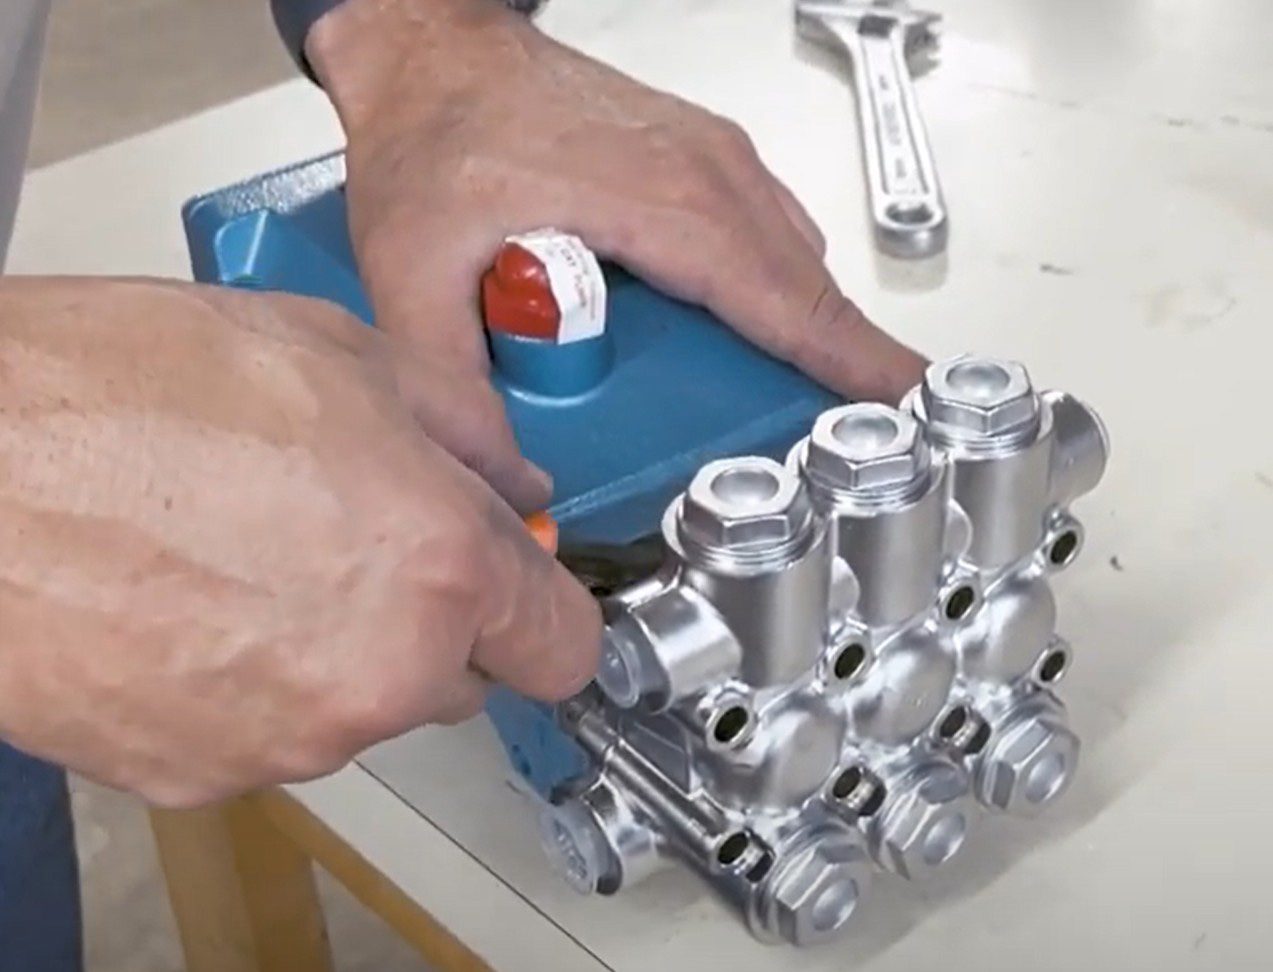
Align the plungers by rotating the shaft. Then, line up the seals on the pump head with the plungers and push the head onto the crankcase.
Reinsert the eight bolts you set aside earlier, securing the head to the crankcase. Congratulations—you’ve successfully replaced the oil seals in your CAT 5CP pump!
If you are a visual learner, check out the video below:
What’s Next?
Once you have finished replacing CAT 5CP seals, you can either put the pump back in service. If you installed a new pump in place of this one, you can store it on the shelf as a backup.
If you have any questions about this process, give us a call, and we’ll connect you with someone who can help!
| Quick Steps to Replace Oil Seals in a CAT 5CP Pump |
| Remove the Pump Head – Unscrew the eight bolts using a 6mm Allen wrench. – Use a pulley (if available) or an adjustable wrench to detach the head. – Separate the head from the crankcase with a pry bar, then remove it by hand. |
| Remove the Old Oil Seals – Take out the plungers using a 10mm wrench. – Remove the retainer, split washer, and slinging washer, keeping them in order. – Turn the shaft to access the oil seal, then use a precision screwdriver to pop it out. |
| Inspect for Debris – Check for debris inside the crankcase. – If metal shavings are present, consider replacing the pump. |
| Install New Oil Seals – Spray seals with WD-40 for lubrication. – Press each seal into place with your finger, then flatten using a 15/16 socket. |
| Reassemble the Plungers – Reinstall the parts in reverse order: slinger washer, split washer, ceramic plunger. – Tighten the plunger bolts with a 10mm wrench (don’t overtighten). |
| Reattach the Pump Head – Align the plungers by rotating the shaft. – Push the head onto the crankcase and secure it with the eight bolts. |
| What’s Next? – Put the pump back into service or store it as a backup. |

About the Author
Phil Donnelly, aka Fix-It Phil
Kleen-Rite Equipment Engineer, Production Manager, Car Wash Operator
Best known for his “Fix-It Phil” persona on Kleen-Rite’s YouTube channel and podcast Kleen-Rite Radio, Phil Donnelly has become a trusted source of technical expertise for car wash owners, operators, and technicians. Beyond his on-screen guidance, Phil was the driving force behind the Operator Pro Plus pump stand, leading its design, testing, and production to create a highly effective solution for self-serve car washes. He also serves as the lead engineer and production manager for KR Equipment, our reliable line of car wash equipment designed and produced in-house specifically for the self-serve segment of the industry.
Before joining Kleen-Rite, Phil spent over 14 years servicing industrial boilers at Delval Equipment. This experience provided a strong technical foundation, enabling him to quickly master the equipment used in car washes due to the similarity of the required skills and knowledge. Phil attended Thaddeus Stevens College of Technology and graduated from the HVAC-R program with an Associate Degree.

