Have you ever wondered how to repair a check valve? Check valves will go bad eventually due to wear and debris. Designed to let water flow only one way, if you start having water or solution backflowing on you, it’s time to inspect your check valve and make repairs if necessary. Repairing your valve can save you money and time, as opposed to buying a new valve altogether.
Tools You Will Need:
- O-Ring Kit: CVS410K
- Pop-It Kit: CVS410P
- Replacement Spring: CVS410SP
- Needle Nose Pliers
- Small Flat Head Screwdriver
- Adjustable Wrench and a Vice or another Adjustable Wrench
Cleaning Your Check Valve:
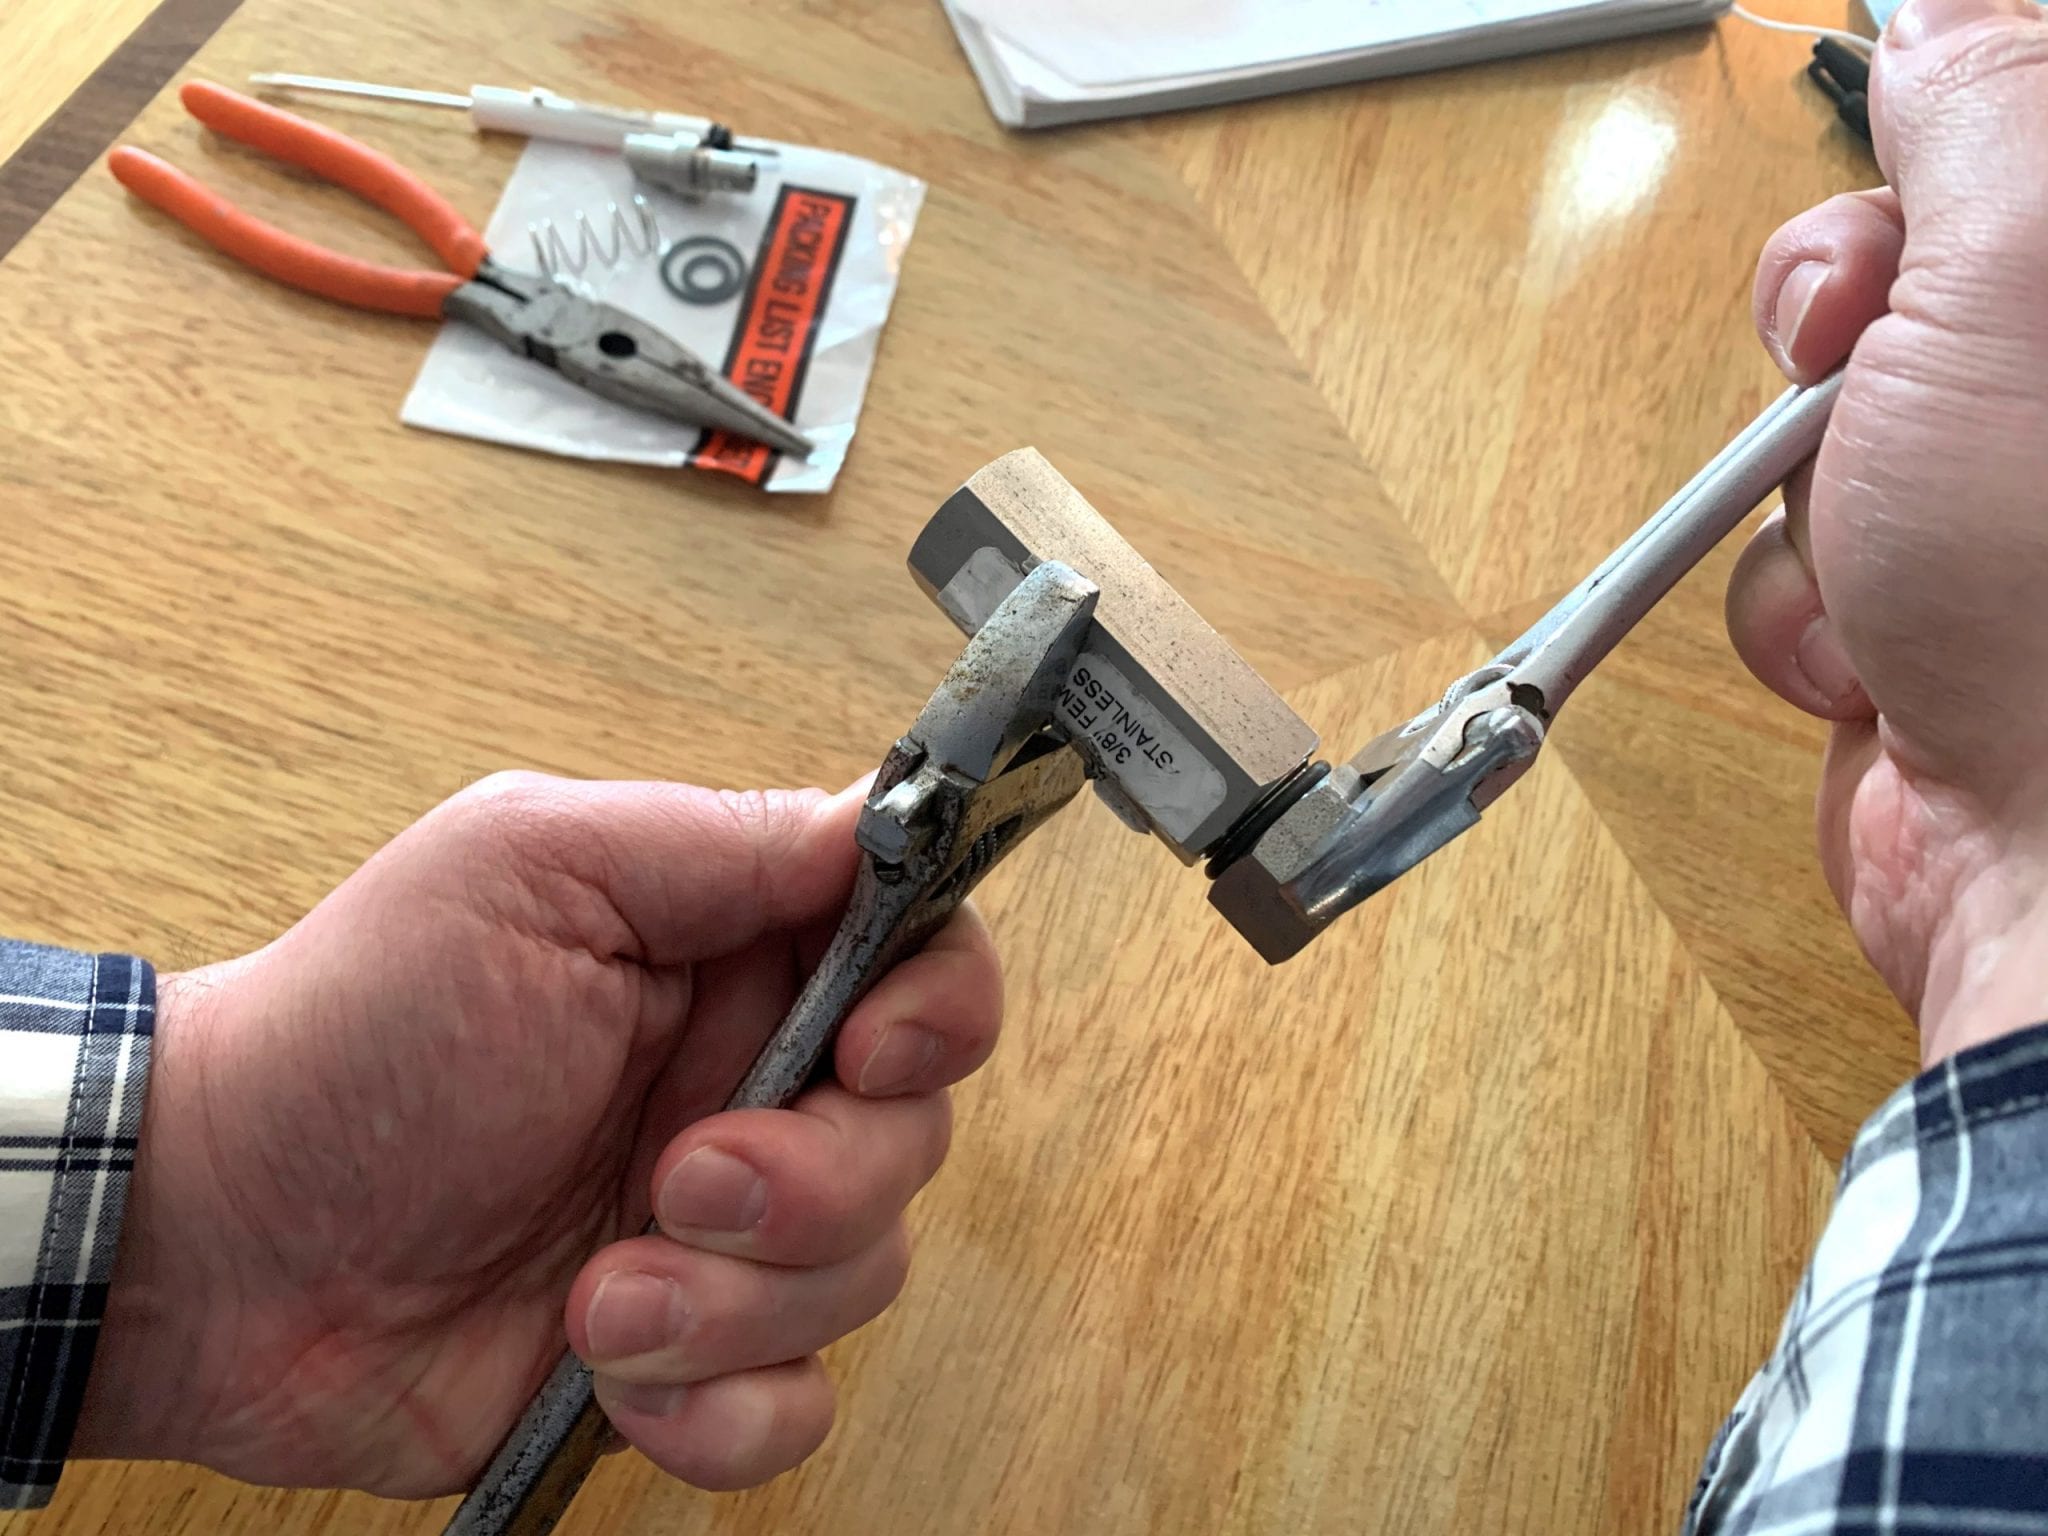
Step 1: Using a vice or an adjustable wrench, screw off and remove the check valve cap.
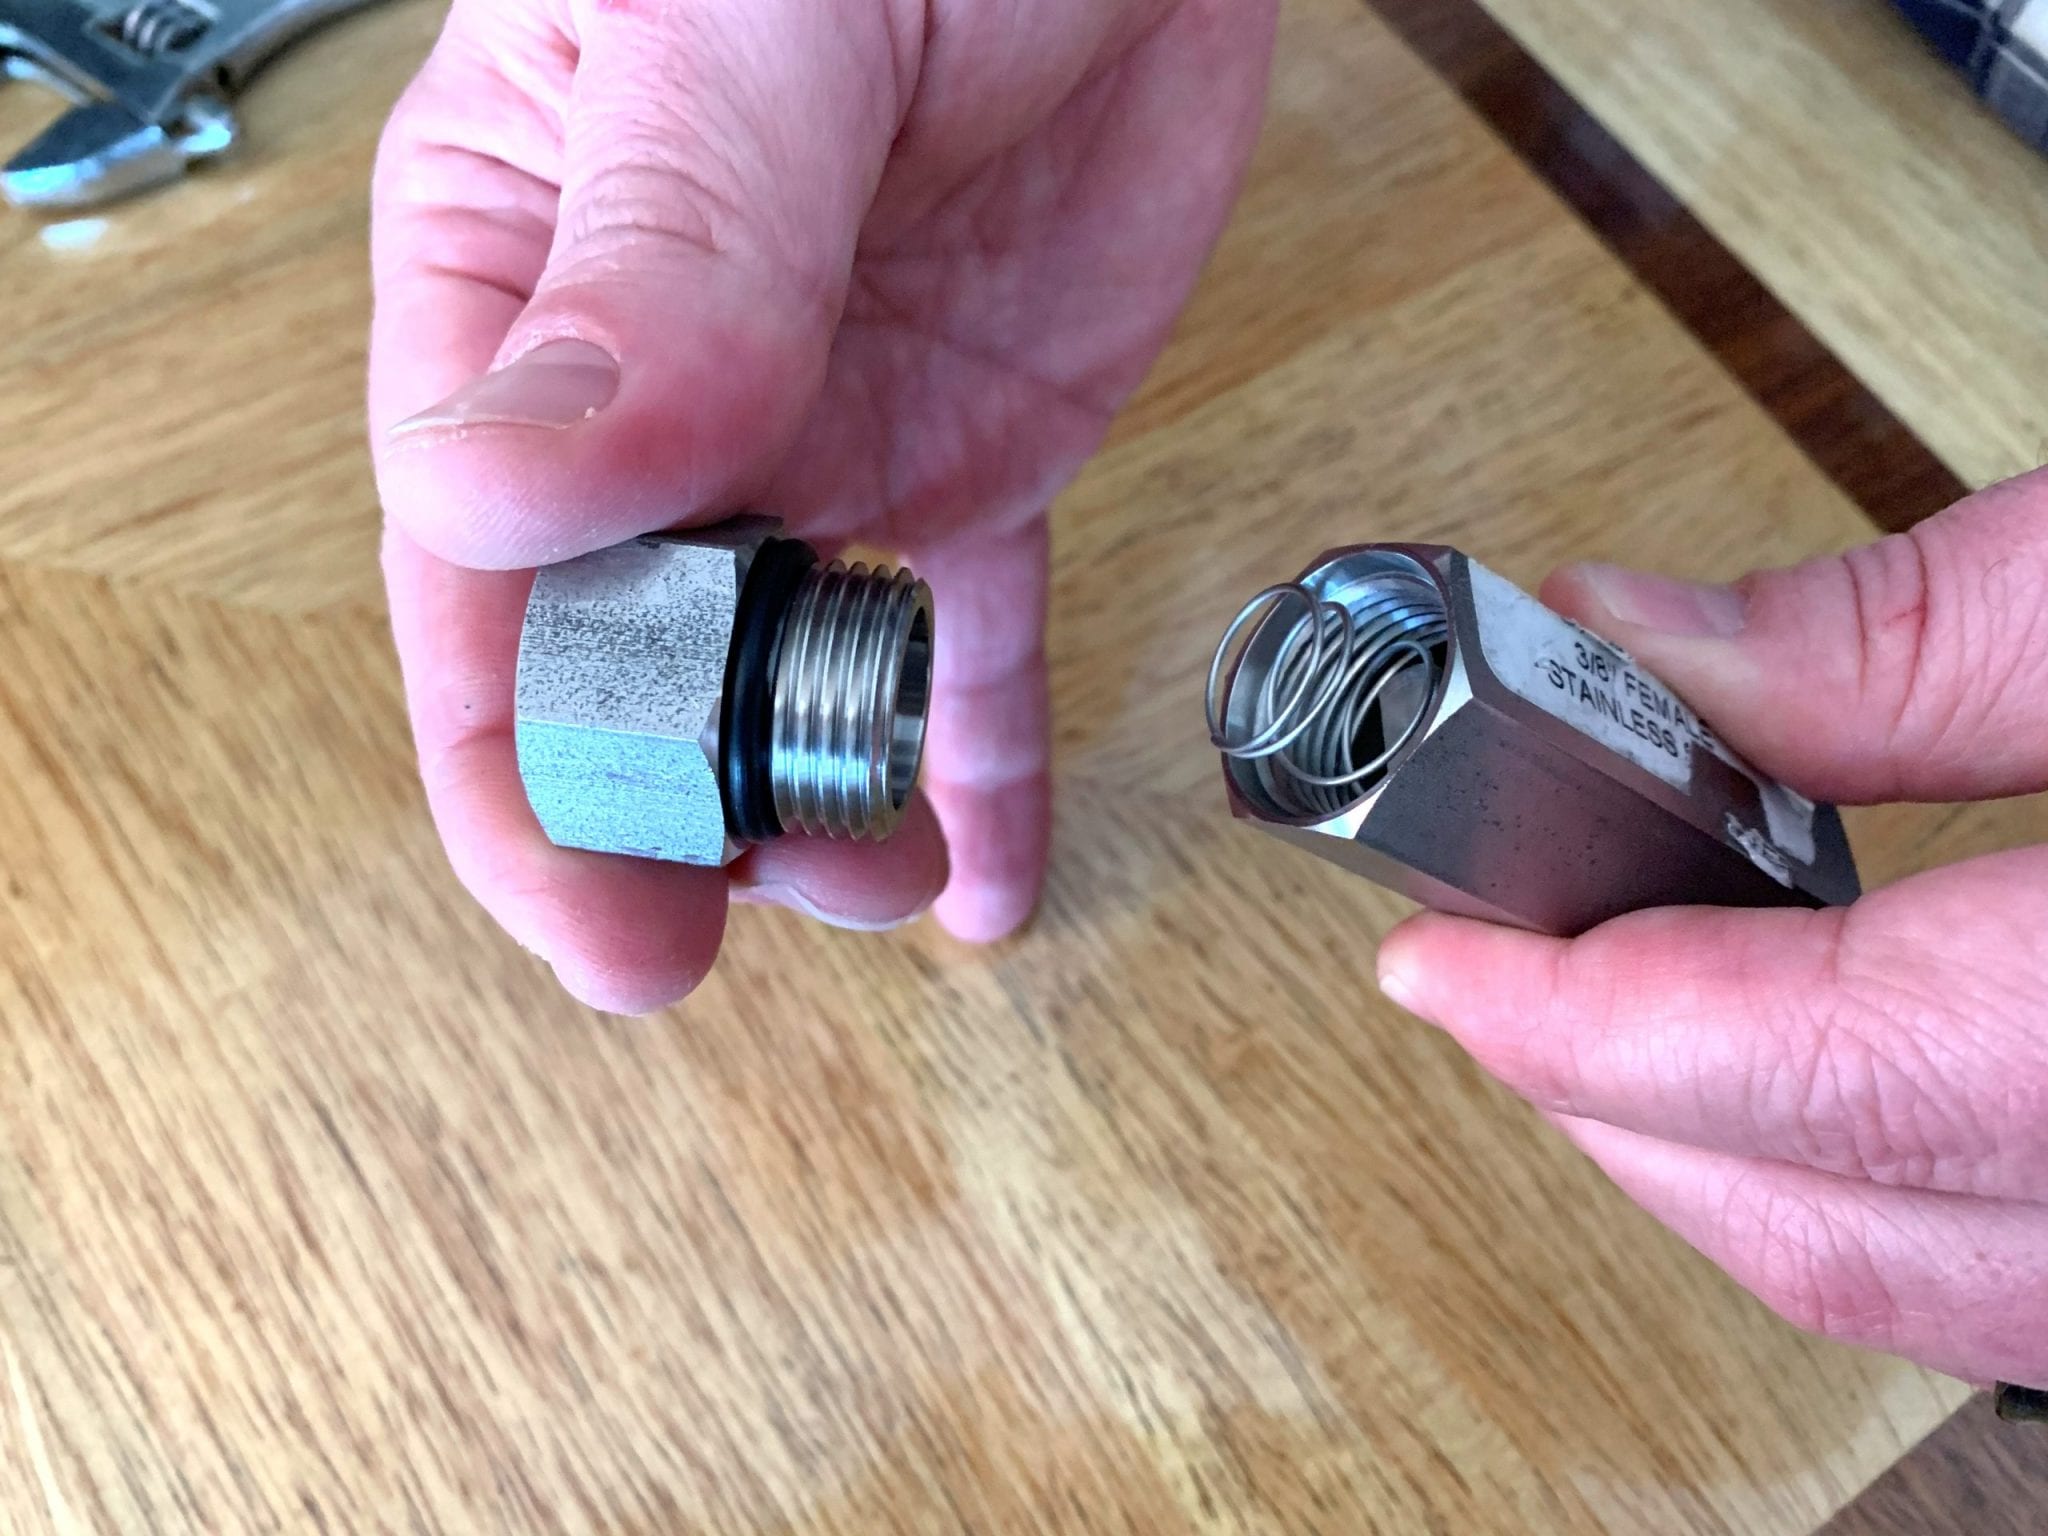
Step 2: Once you get the cap removed, inspect the O-ring, cap and spring inside for any damage, wear or debris.
Replace the spring as it is inexpensive and easy to do.
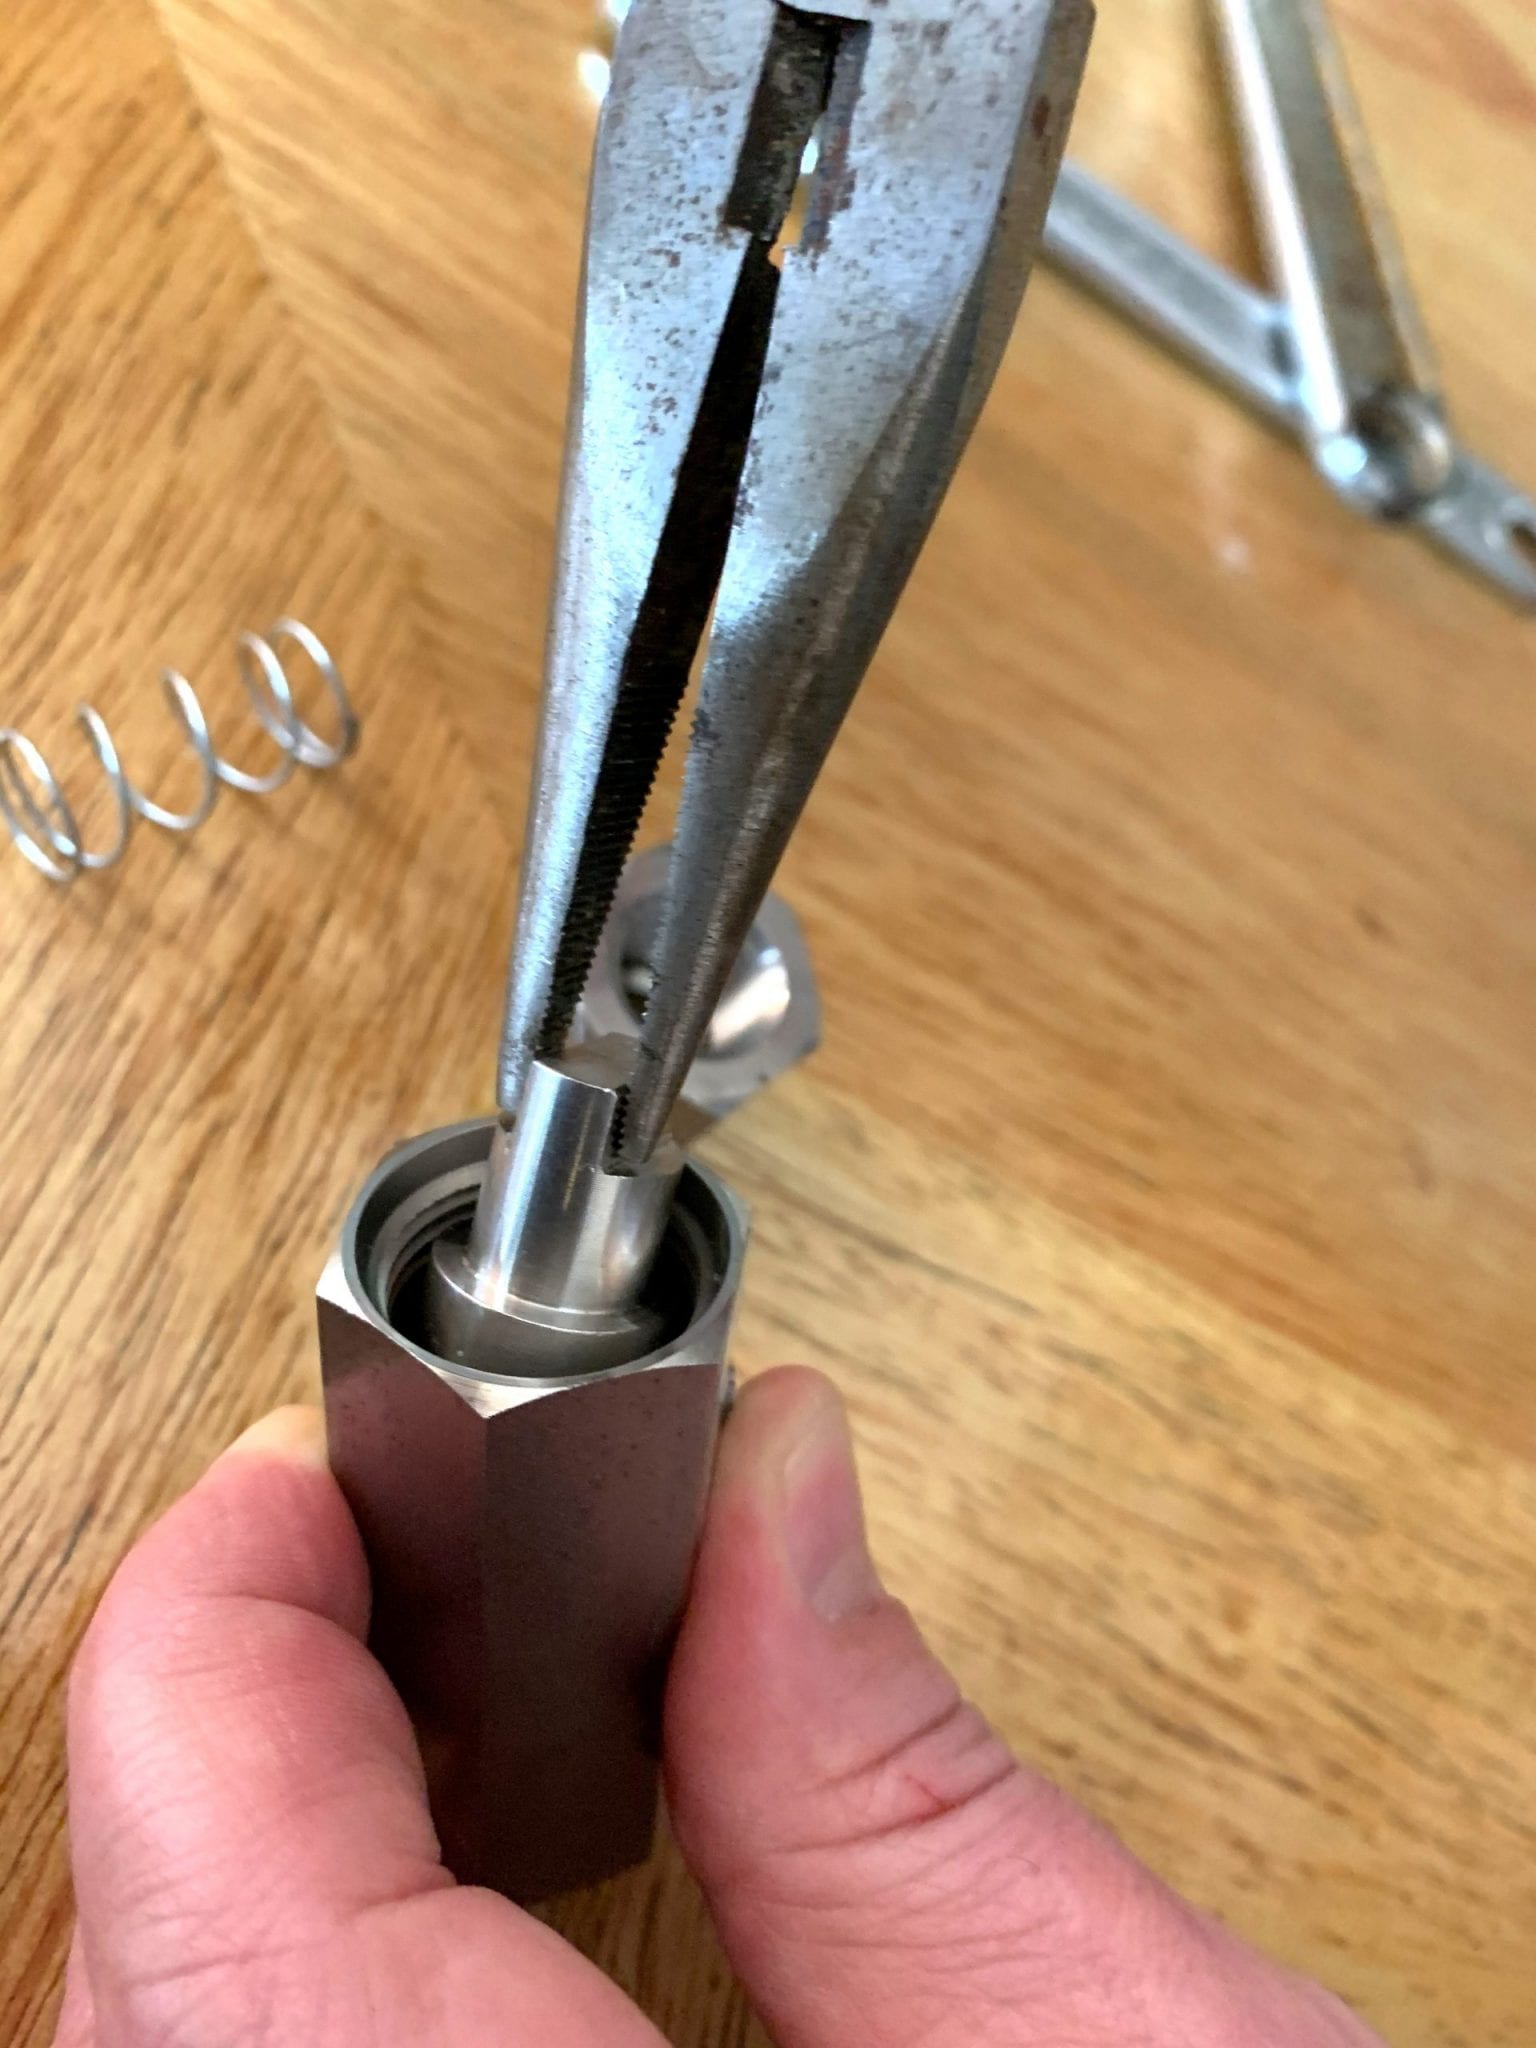
Step 3: Use your needle nose pliers to remove the Pop-it from inside the check valve body.

Step 4: Inspect the O-ring on your Pop-it.
Replacing the item is a low-cost maintenance part that might as well be replaced while you have the check valve disassembled.
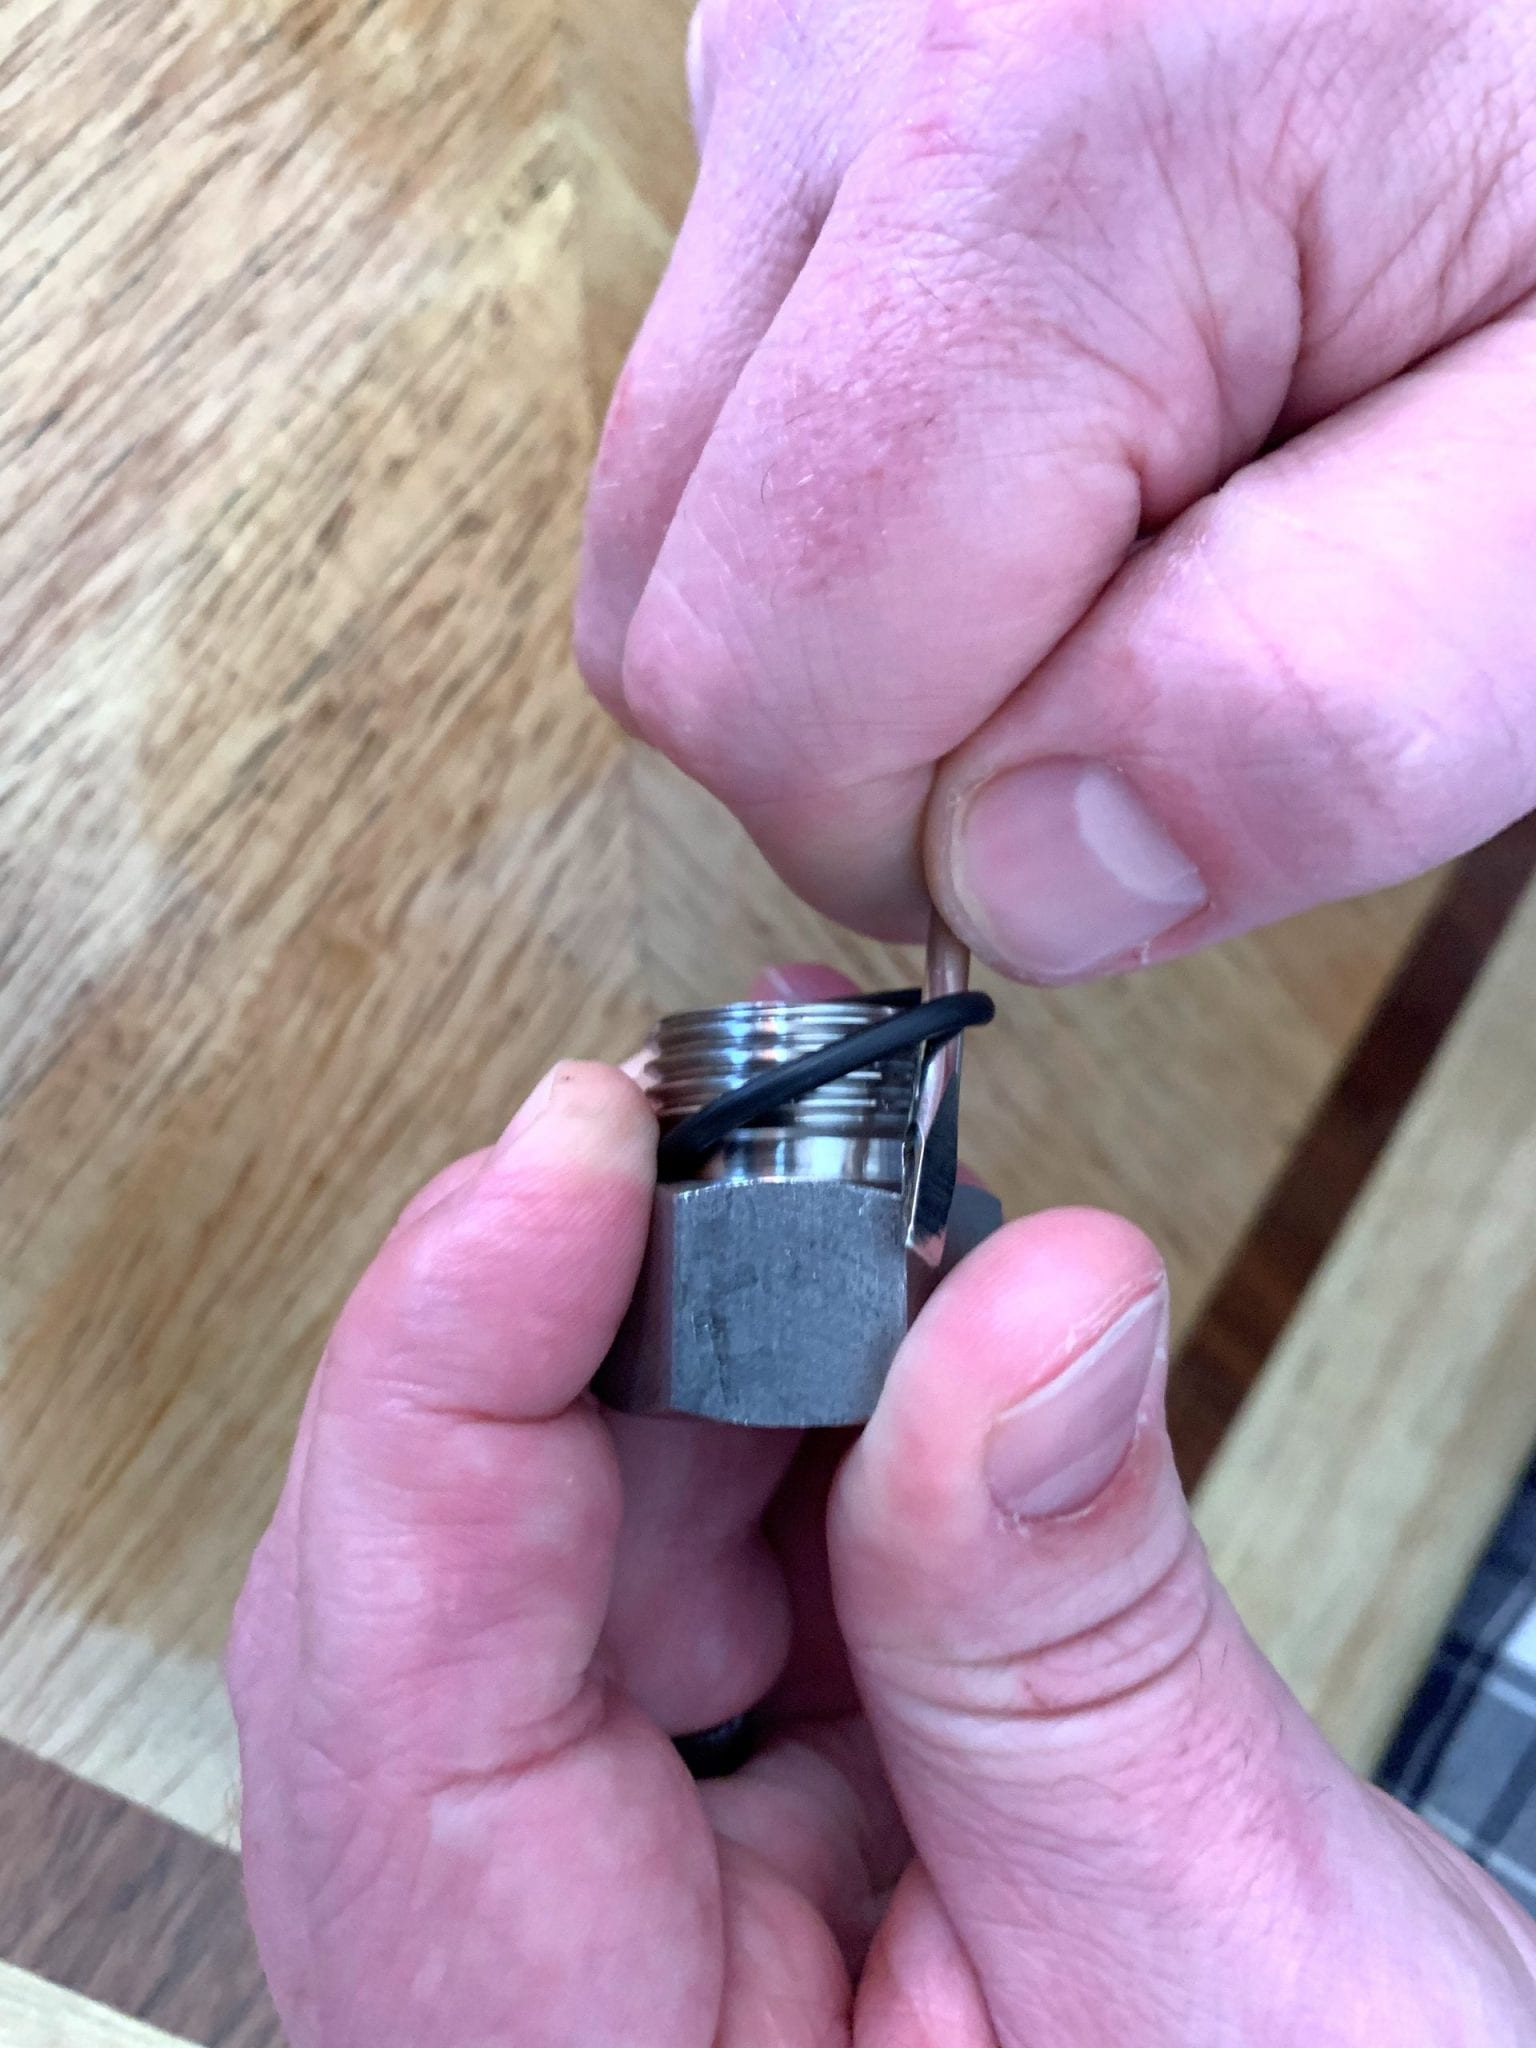
Step 5: Remove the O-ring on your cap as well using your small flat head screwdriver. They may be snug and stubborn, keep at it and you’ll get it to come off.
Once you’ve got all the O-rings and spring replaced, simply reassemble the check valve and be sure it is really sealed tight.
