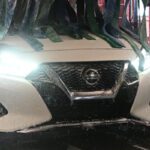
Car wash vacuums sit outside 365 days a year. As a result, the appearance of your vacuum units will deteriorate over time due to various weather conditions and harmful ultraviolet rays from the sun. Lucky for you, Phil put together a guide to help you revive the vacuum units at your car wash!
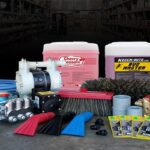
Tools You’ll Need:
- Single edge razor and blade holder
- Heat gun
- Lacquer thinner
- Gloves
- Rag
- Stainless steel polish
- Tape measure
- Sharpie
- Soap and water
- Spray bottle
- Credit card or similar tool
Removing a Decal
Use a razor blade to remove unattractive decals from car wash vacuums. Peeling decals are easier to remove since the razor will slide under the rolled edge. Otherwise, you will need to work the blade under the edge to get it started. If you are having trouble, use a heat gun to loosen the adhesive backing on the decal to make things easier for yourself.


Dealing with Leftover Adhesive
After the decal is gone, you will need to remove the leftover adhesive on the cylinder. Soak a cotton rag with lacquer thinner and rub the surface to wipe away the glue. Warning: heavy elbow grease is required! Apply additional thinner to the rag as needed to keep things moving smoothly. Check for any leftover thinner and wash it away with water to create a clean surface for the next step.

Preparing the Surface for a New Decal
Shine the surface with a stainless steel polish and cleaner. Spray the surface with the polish and buff the surface using a towel. Phil used Simoniz Swell and one of Dr. Joe’s Microfiber Towels in the video. Once the surface is shiny, you are ready to apply the decal.

Sticking on the Decal
You will want to ensure the decal is level when you stick it on the vacuum cylinder. Use a tape measure to determine the location of your decal. Mark two spots that are horizontal to one another. Check to make sure they are level. These marks will help you will place the decal level.
Before sticking on the decal, mix a solution of soap and water. Soak the surface with the mixture. The soap will prevent the adhesive from sticking to the surface for a short time. This trick will allow you to reposition the decal and use a credit card to remove air bubbles and wrinkles from the decal. Once you finish, take a step back and check your work. Make any additional adjustments before the decal fully adheres to the vacuum.


Replacing a Faded Vacuum Dome
Phil also swapped out a faded dome for a brand new one. First, remove the screws holding it on. That will allow you to remove the old one. Once the old dome is gone, you can place the new one on top of the vacuum unit. Line up the screw holes, and insert two 1/4 inch – 20 screws to attach it to the vacuum. You can either reuse the originals if they are in good condition or purchase a new set. Once the screws are in place, the new dome is secure.
Tip: Apply a tire shine product to a slightly fading dome to rejuvenate the appearance if you are not ready to replace it yet.

Changing Hose
The last refresh Phil recommended is to replace an old vacuum hose. All you need to do is twist the hose clockwise to remove it. Install the new hose by turning it counterclockwise. Once the hose is connected, it will require a cuff with a claw nozzle to function correctly. The cuff must hit the stop on the claw to ensure it is secure. Screw on the cuff counterclockwise to attach it to the end of your hose.


After you finish these tasks, your car wash vacuums will look brand new again. Customers will see you maintain your equipment and care about the presentation of your business, which increases their confidence in the quality of the products and services provided at your wash!
You can check out the full–length video at our YouTube channel – drop some questions or suggestions in the comments and we’ll make sure to get Phil fixin’ it in one of our future episodes!

About the Author
Phil Donnelly, aka Fix-It Phil
Kleen-Rite Equipment Engineer, Production Manager, Car Wash Operator
Best known for his “Fix-It Phil” persona on Kleen-Rite’s YouTube channel and podcast Kleen-Rite Radio, Phil Donnelly has become a trusted source of technical expertise for car wash owners, operators, and technicians. Beyond his on-screen guidance, Phil was the driving force behind the Operator Pro Plus pump stand, leading its design, testing, and production to create a highly effective solution for self-serve car washes. He also serves as the lead engineer and production manager for KR Equipment, our reliable line of car wash equipment designed and produced in-house specifically for the self-serve segment of the industry.
Before joining Kleen-Rite, Phil spent over 14 years servicing industrial boilers at Delval Equipment. This experience provided a strong technical foundation, enabling him to quickly master the equipment used in car washes due to the similarity of the required skills and knowledge. Phil attended Thaddeus Stevens College of Technology and graduated from the HVAC-R program with an Associate Degree.