
Kleen-Rite and its customers were lucky to have Tom Allen teach us about car wash operations for many years before his passing. We get a ton of calls asking how to clean a Mars validator and how to mount it in the coin box. Well, here’s Tom’s Way of doing it!
Tools You Will Need:
Q-Tips and alcohol or cleaning solution. You can also use a cleaning kit from one of the top changer manufacturers. Kleen-Rite carries several cleaning kits; ask about one today!
Cleaning Your Mars Validator
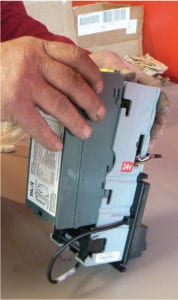
Step 1: First remove the stacker by lifting up and out.
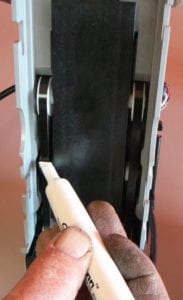
Step 2: Clean the stacker belts with a citrus cleaning pen.
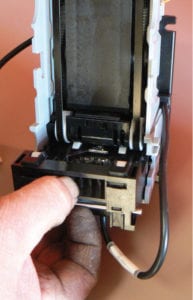
Step 3: Next, remove the mag-head by lifting up on the lockbar. Then, pull it out.
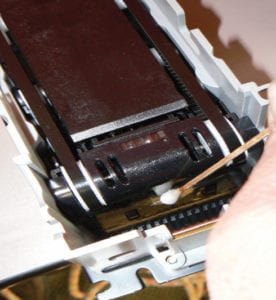
Step 4: Using a Q-Tip and cleaning solution or alcohol, clean the internal sensor strip.
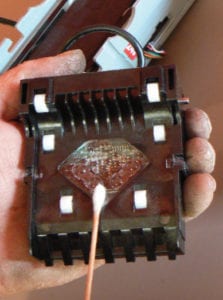
Step 5: Using a Q-Tip and cleaning solution or alcohol, thoroughly clean the mag-head.

Step 6: Using a citrus pen or Q-Tip and cleaning solution/alcohol, thoroughly clean the mag-head wheels. The wheels will rotate as you clean them, so hold them steady.
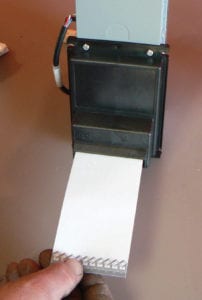
Step 7: After Step 6 is complete, reassemble the validator. Insert a cleaning strip into the bill acceptor to remove excess cleaning fluid and lint. Cleaning strips are available from Kleen-Rite.
Mounting Your Mars Validator
Step 1: Your coin box faceplate will need a hole measuring 3 1/4″ W x 2″ H for your validator. If you need to create the hole, make sure it is plasma-burned.
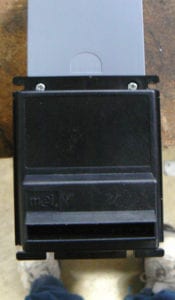
Step 2: Use your Mars validator for a pattern to cut in the mounting stud holes.
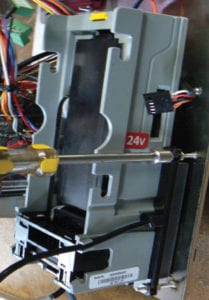
Step 3: When ready to mount, use 6/32 flathead bolts and washers to attach your faceplate.
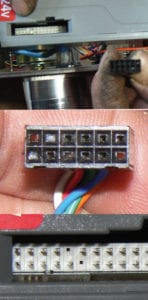
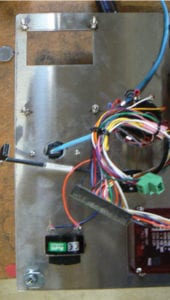
Step 4: Connect the power harness. Look inside the harness head to find the two dead spots and make sure they match up with the two dead spots inside the validator to ensure proper alignment. Gently push harness until it is seated. Consult the instruction manual for proper wiring.

Watch this video and our entire library of Tom’s Way Videos on our YouTube Channel!
