Kleen-Rite and its customers were lucky to have Tom Allen teach us about car wash operations for many years before his passing. This is a re-post of one of his more popular tutorials where he explained how to service a Hydrominder. You will need a 1/4″ nut driver or a #6 flat head screwdriver.
Step-By-Step Hydrominder Instructions with Pictures
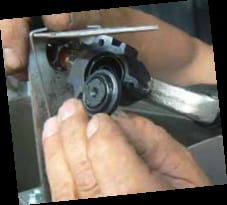
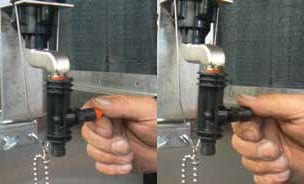
Step 1. Turn water valve off at hydrominder inlet.
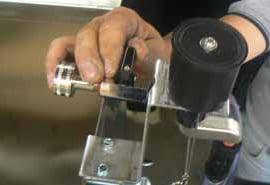
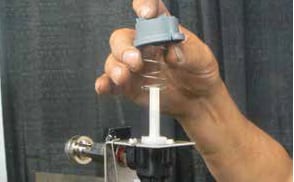
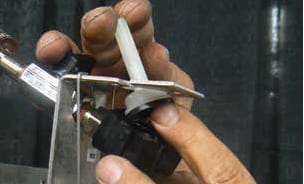
Step 2. Remove hex nut on top of magnet cap with flat head screwdriver or nut driver.
Step 3. Lift off magnet cap.
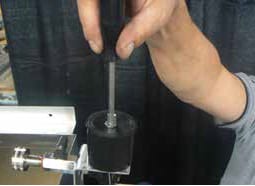
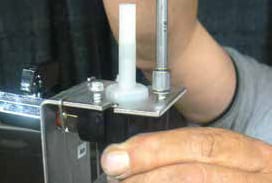
Step 4. Hold down on magnet and remove magnet yoke.
Step 5. Remove magnet and magnet spring.
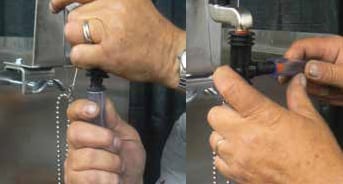
Step 6. Remove discharge and pickup tubes.
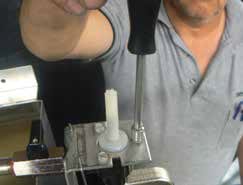
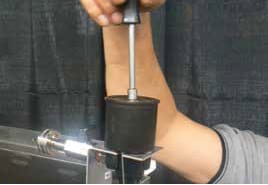
Step 7. With 1/4″ nut driver, remove the 3 screws that hold valve body to bracket.
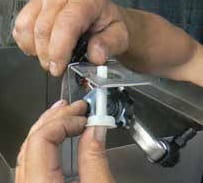
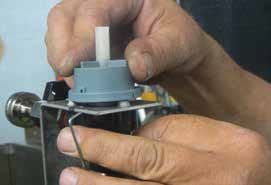
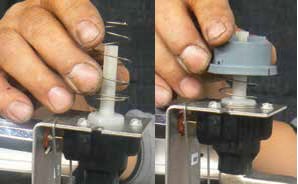
Step 8. Removed plunger assembly and stem from valve body.
Step 9. Remove diaphragm from valve body. Inspect, clean, or replace diaphragm.
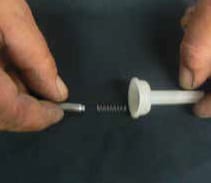
Step 10. Inspect, clean, and/or replace plunger and spring assembly.
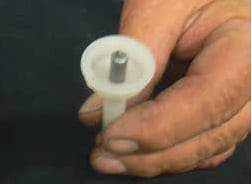
Step 11. Replace spring and plunger back into stem.
Step 12. Put diaphragm on top of stem assembly.
Step 13. Insert stem assembly back up through bracket and then bring valve body back up to stem assembly and place together being careful that the diaphragm and plunger assembly doesn’t pop out or get lost.
Step 14. Re-tighten the 3 screws that hold bracket and valve body together.
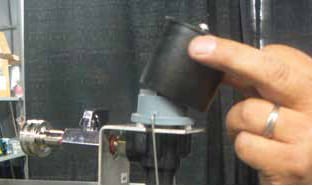
Step 15. Reinstall spring and magnet back onto stem.

Step 16. Reinstall magnet yoke and replace the magnet cap.
Step 17. Screw the magnet cap back on.
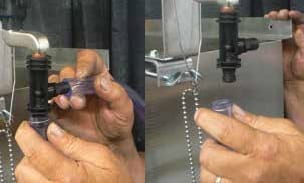
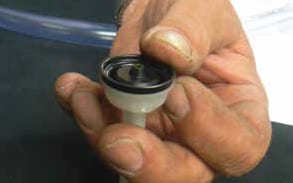
Step 18. Remove colored tip and suction stub.
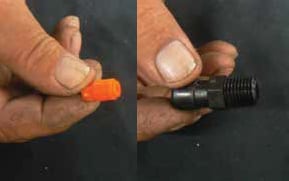
Step 19. Inspect, clean, or replace the colored tip and suction stub.
Step 20. Reinstall pickup and discharge tubes.
Step 21. Turn water valve back on.

Step 22. Manually pull down on magnet yoke to test water and chemical draw, and then let go again. If the magnet clicks, it is in the ON position. It is now ready to go!
Watch the Process on Video
If the pictures above aren’t quite enough to help you fully understand what’s happening at each step, give the full video a watch. Tom completely explains and demonstrates the process.